I love crafting and so does the penguin

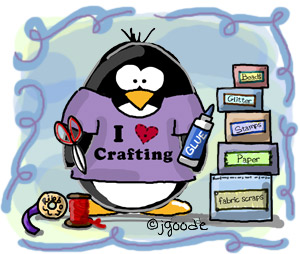
i love crafting penguin by jgoodeI was listening to a weekly web-cast called Cool 2 Craft and realized I didn’t have a crafting penguin. How is that possible? With all the other gazillion penguins I’ve created over the years, and as much as I love crafting myself, I was in shock to find out I never created an official crafting penguin!

So while I listened to all the great ideas on the show, I drew up this new penguin and I’m positive it loves to craft too. I haven’t created a brand new penguin in a while and I can honestly blame it on the glue. I went to a craft trade show back in January and absolutely fell in love with crafting all over again. So lately I’ve been spending most of my time jumping back into the craft scene.

I’ve made a ton of new friends and am learning new things every day. Most importantly, I’m finding my creative mojo all over again. It’s been a long time I’ve played in this area of my brain – I forgot how much I loved it. Hands-on creativity can’t be matched. I’m seeing more ideas in my head. You should try it! grab a piece of clay and just squish it around a while… see what happens.

I don’t have a particular area of crafting I like more than others although I really enjoy textures… fabrics, paper, anything tactile is very intriguing to me. I also really enjoy mixing things to see what happens. Combine glue and paint or fabric and clay… mix and match to see how the textures and materials combine. One of my most recent activities has been creating stamps out of craft foam and stencils out of freezer paper. I’ll show examples and some how to tutorials another day. These ideas both open the doors even wider for using my own drawings on a variety of materials.

What’s your favorite crafting area?
Under the sea for charity

The CHA summer show is fast approaching, and as much as I loved attending the CHA winter show in January, I am unable to attend this next upcoming event. However, my art will be there! I was asked to participate in an fund raising event for the Wyland Foundation. There will be a silent auction with the proceeds going to help educate children about the environment and conservation.

The theme for the even is “Under the Sea”. Living in the middle of a land locked state, I rare have the opportunity to experience anything relating to the ocean first hand, so this project was particularly fun for me to imagine.

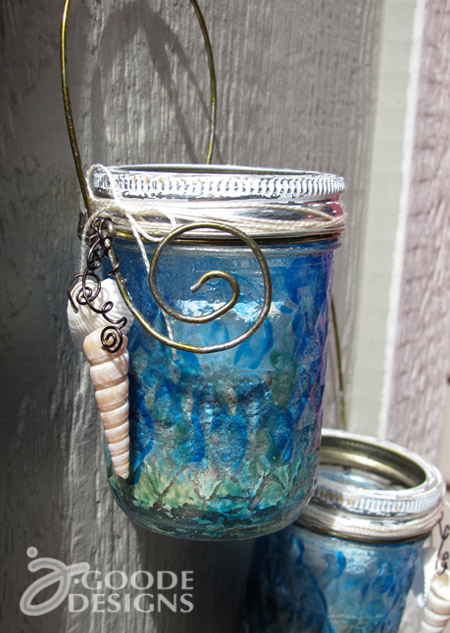
The first item I made is a pair of hanging votive holders. I imagined walking along the beach at night near old wood posts, each glowing from a single hanging candle.  I tried to create this same kind of deocr item that can be used both inside and out. Each glass jar is hand painted using enamel paints from Plaid. The lids were painted with several different shades of craft paint and then sanded for a weathered look. Then I added the hanging handle and large swirl embellishment by bending a wire clothing hanger. Finally I added small bent wire accents along with hanging sea shells and a bit of thin twine. Finally, each candle holder was partially filled with sand and a small votive candle was added.

hanging votive holder for charity event

The second donated item I created was a summer outfit for a toddler girl. The inspiration for this piece was the vision of an afternoon picnic on the beach with a cool breeze. The skirt was sewn using re-purposed linen which I then stamped with fabric paint using 3 seashell design I hand cut in craft foam. Both the skirt and top also incorporate white eyelet fabric.

hand sewn summer outfit for charity event

hand sewn little girl outfit for charity event

I’m so thankful this was a summer themed project, had it been winter I would have been inspired to knit… not one of my strengths.

A little glue fixes anything

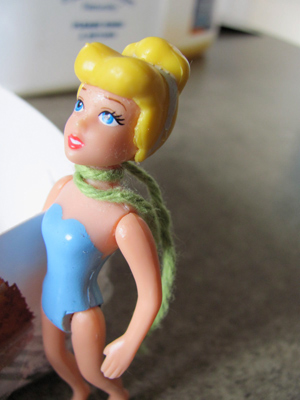
A few week’s ago my 3 year old accidentally popped off the head of her new princess doll. She was trying to take the poor girl’s hair off. Of course the shiney yellow hair helmet was glued on, so her head came completely off in the struggle. The don’t make dolls like they used to, especially these tiny Polly Pocket sized divas. So the headless dollie sat on my desk for over a week waiting for me to decide it’s fate.

polly pocket lost her head and I fixed it

Lucky for the doll I collect all sorts of tools and supplies. With a little help from my jewelry pliers and some The Ultimate glue, I was able to reunite her noggin with her out of proportion body. She was dressed with a new chic green scarf during the healing process to make sure her head stayed attached while the glue dried.

yet another reason crafting is happiness!

Diversify your art

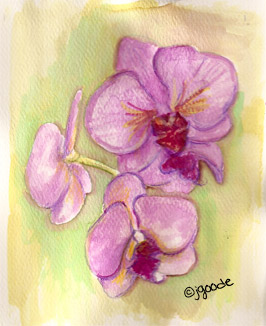
watercolor painting of orchidsBeing consistant with style and technique is important when striving for a career in art. However I find it rather inspiring and rejuvenating to try new ideas. learning a technique in an entirely different discipline can inspire an idea in an area I’m already familiar. For example, I love tactile features in art such different types of papers and fabrics. I enjoy creating mixed media collages and am always looking for new ideas of things to incorporate. This interest in textures definitely plays a role in how I color the images I use in my business.

Being able to jump into using different mediums or at least become familiar with different techniques can also be helpful if you want to broaden the reach of your art. I think it’s important to know who you are as an artist and what you can accomplish, but I think it’s just as important to be able to find ways to bring out new ideas and grow your artistic ability… and for me it’s using different tools.

Over this past weekend I was trying to come up with a gift idea for my grandmother’s birthday. She loves orchids and I knew I wanted to make her something rather than purchase from the store. So I dug out the watercolors, which I haven’t touched in ages, and I painted a little picture of an orchid. I used this image to make reproductions as handmade note cards she can send to her friends. The goal was to come up with something I thought she might like while trying something new. It didn’t turn out like the picture in my head, but I’m happy with how it turned out.

The trick is to challenge your creative brain. Something as simple as a color change, if you use the same palette all the time, can really awake your creative thinking side. Stretch your artist muscle and try something new and see what you can come up with… it might surprise you what you didn’t know you can do.

Fun with bows you can make yourself

I absolutely love gift wrapping and all the fun accesories that go along with it. To me, the presentation of a gift should show as much love for the person as the gift itself. It’s an opportunity for a message – a moment to say “HEY YOU, you’re special to me” before the gift is even opened.

I’ve always loved the task of wrapping presents. So I am especially thrilled with this last in the series of blog hop posts for Eileen Hull‘s Sizzix Scoreboard dies. It’s a make-it-yourself bow aka “create-a-bow” – love it! Rather than get creative and try to make something new out of the bow shapes, I decided to keep this one simple and just enjoy the love of the gift bow.

The die itself cuts 3 different paper strip sizes and a couple button shapes but the possibilities for bow making is not limited to a single bow type. There’s a number of ways to bend the paper strips or alternate sizes to create a variety of bow styles. I’m especially excited about the idea of being able to make my own bows to coordinate however I like. I can make my own patterns or use favorite papers, even fabric. Mix and match colors instead of sticking with the standards at the store.

This is definitely my favorite Sizzix project, how can we not be happy making gift bows? Bows often remind me of flowers and today I was thinking a big ball of bows would make a fantastic hydrangea, or the three piece bow could be a pansie, thus the color selection for today’s project.

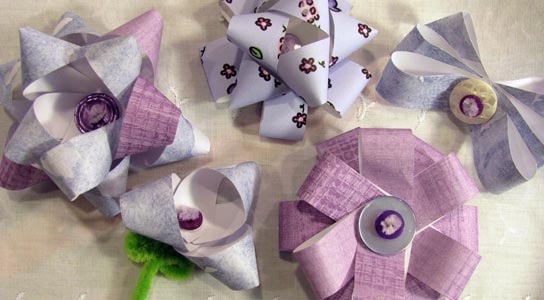
Here are a few of the bows I came up with, the center middle is my own pattern design as well.

Make your own gift bow with Sizzix

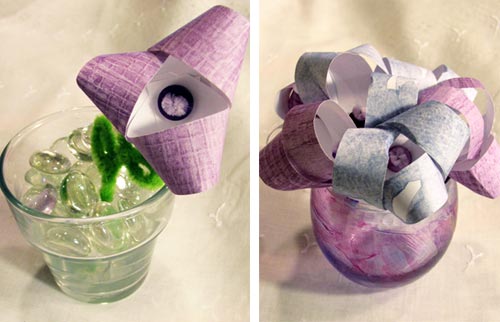
And here  are two cute little center piece or party decor ideas, both using small votive candle holders.

Cute center piece decor with Sizzix bow die by Eileen Hull

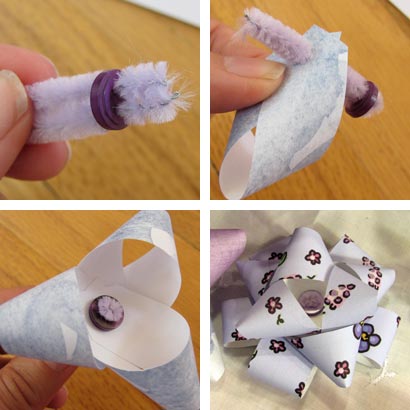
I chose to use pipecleaners and real buttons to put together my bows. You can use a variety of items to assemble these, including a standard brad or the paper button shape that comes within the die.

Here’s an example of how to make a standard bow:

  1. cut a small piece of pipecleaner, fold it in half and run through the holes in the button.
  2. use one paper strip and loop it so the corners overlap eachother, same side facing up.
  3. Push the pipecleaner through the holes in the paperstrip until the button is flush with the paper.
  4. repeat with additional paper strips until the bow is the size and look you want.

How to make a bow with Eileen Hull's Sizzix bow die

If you’d like to get a hold of the create-a-bow, visit the Sizzix shop online.

Check out more great make-your-own bow project ideas from the following websites:

Ann Butler

Bonnie Bruns

Candice Windham

Craftside-A behind-the-scenes peek at a crafty world

Debra Quartermain

Eileen Hull

Einat Kessler

Life in the Craft Lane

LollyChops

Michelle Cummings

Modern Surrealist Marisa Pawelko says CHEERS to the Sizzix Blog Hop!

Roxi Phillips

Sparkle’s Bow Bracelet

Veronica Goff

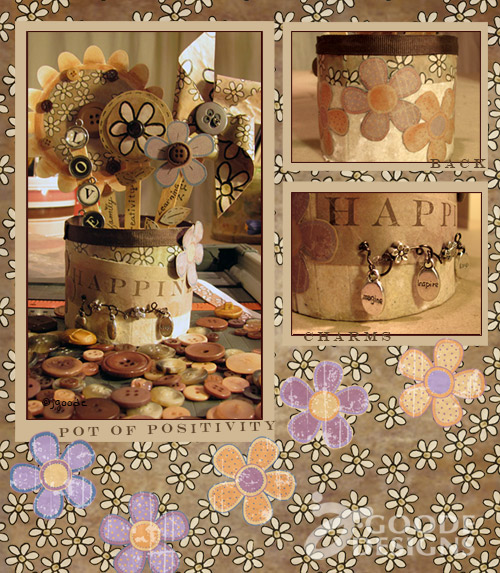
A few of my favorite things in a pot of positivity

This is round 4 of the blog hop with Eileen Hull and her fabulous Sizzix scoreboard dies. Read below how you can win a cool prize just for commenting.

This particular project is utilizing the cake shape, but I was feeling a bit springy (despite the once again snowy weather in my backyard) so instead I turned the cake into a flower pot.

A few of my favorite things in a pot of positivity

I’m particularly proud of this piece because…

  1. All graphics I created myself and actually used. I created a few patterns and some stand alone images that I cut out and pieced together. I tend to make a lot of things for other people to use but rarely have the opportunity or think of how to use it myself.
  2. I really love the style. The vintage, grunge, steam punk, weathered styles I see, but rarely have an opportunity to work on myself. I’ve created a number of art pieces using this style, but don’t often have anywhere to show them off. The color schemes and idea of combining old and new has always been a favorite.
  3. I love to share ideas about happy things. The “challenge” this time was “my favorite…” which I suggested to Eileen a few weeks ago and she actually liked the idea and decided to use it. Then my  struggle was deciding on a “favorite” to include. I couldn’t – so I combined ideas… thus the idea of a “pot of positivity”.
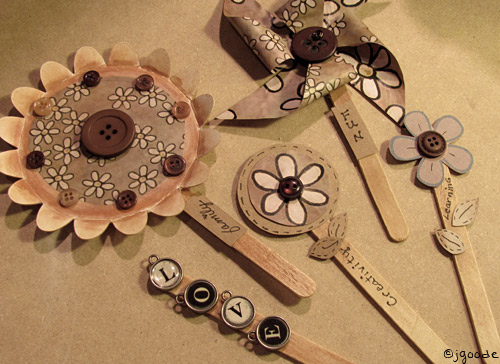
  4. I incorporated a number of things I particularly like – which again, I don’t do as often as I’d like. Some of the things I included are: daisies, swirly lines, the color scheme, some hand doodling (using a real ink pen vs a computer pen), various textures and materials combined in one project (wood, fabric, paper), and concepts.I love to include things that one can ponder over and over so I included the words “love”, “family”, “fun”, “learning” and “creativity” as ideas that can spark a thought at any time . Similar to the idea of a little wishing stone, each flower can become a focal point for an idea.More things to think about: The front says “Happiness” and there are 3 dangling charms that read “imagine”, “inspire” and “laugh”.
  5. There’s a purpose to it. This is something tangible that can be handled, inspiring ideas – each flower is removable and can be held, thought about, moved around. Even the pinwheel really moves.

I had no idea what I was going to do when I started this project, I’m excited to have this turn out from allowing myself to just create without planning ahead.

happy thoughts flowers

Some other fun things I included…

  • Chalk. While at the CHA winter show I picked up some neat craft chalk from Craft-t. I used it for the first time with this project for tinting the popsicle sticks, and large flower. I LOVE IT! Some of the chalks even has a fun bit of sparkle to them, very fun.
  • Buttons. I love the look of buttons – but never have a reason to use them. Over the weekend I found an entire bag of brown buttons I forgot I had, so here they are.
  • I still used hot glue and mod podge – something amazine will have to come along to replace both if I’m every going to stop using either.

comment to win
Enter to win a Sizzix die by clicking to visit Eileen's blog and leaving a comment

Take a moment to check out what the other designers have done with this fun Sizzix cake die. There is crazy cool creativity going on around here! (plus you could be the randomly selected winner for a neat prize if you leave a comment on Eileen’s blog!)

Ann Butler

Bonnie Bruns
Candice Windham
Craftside-A behind-the-scenes peek at a crafty world
Debra Quartermain
Eileen Hull
Einat Kessler

Just a Thought or Two
Karen Burniston
Laura Bray
Life in the Craft Lane
Lisa Rojas, Stampin’ Queen Creations
Modern Surrealist Marisa Pawelko
Niki Meiners

Roann Mathias Calligraphy
Sandy Laipply


Why I Love to scrapbook

Over the years, manufacturers have come up with some amazing products for scrapbooking. From specialty cutters to stamps and varnishes, fabrics and embellishments, the scrapbook industry has grown leaps and bounds. Now with the internet at our fingertips, sharing techniques, tips and tricks is only a few clicks away. It amazes me the options we have to be creative… all in the name of love for our friends and family.

15 years ago when my first son was born, Creative Memories was just starting to really come into the scene and hardly any one I knew actually did any kind of scrapbooking at all. Back then the focus (at least for me) was just working on saving the memories with pictures in a photo album of some kind. Once I was introduced to the idea of creating a scrapbook I would try to add a page theme to add some extra interest, but nothing extraordinarily fancy. I wanted to remember the moment, but I didn’t do much in the way of journaling, so I tried to recreate the same feeling with the look of the pages I put together.

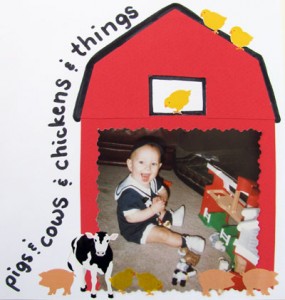
Scrapbook idea - barn

My son used to love playing with his farm animals, so to keep that memory, I created a little barn scene using a photo I had of him playing with his farm playset. In this example, I used solid colored paper, specialty scissors, a black marker and some farm animal stickers.

Scrapbooking is whatever you make it to be. It’s all about adding your own personality and experiences into your layouts. Some people create bright cheerful layouts full of color and excitement while others prefer the subtle colors of a vintage look creating more of a mood setting of romance or deep thought. The pages you create can have unlimited possibilities in how they look as well as the options you choose for supplies to use and how to use them. You can create something very complex, or very simple – it’s up to you!

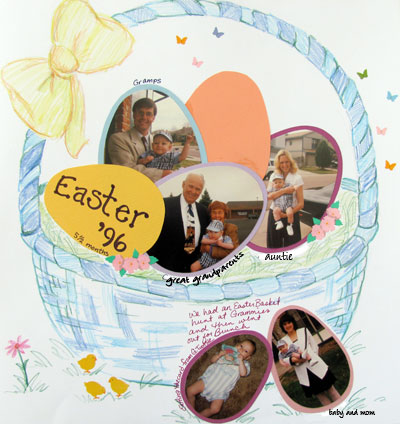
Easter Basket scrapbook layout

Before all of the fabulous options of dies and embossing and stamping techniques were available, I would add special interest by using my drawing skills and stickers (I’ve collected stickers since I was 9, it’s about time I used them for something, right?). In this example I used color pencils to draw a basket, stickers and craft paper to create a egg shapes to create a  cute Easter basket theme full of family memories (note the year… 1996!).

Scrapbooking is all about preserving memories. Whatever is important to you in capturing those moments, include those thoughts into your page layouts. Write notes, poems or jot down funny quirks about the day. Include colors that remind you of the event.

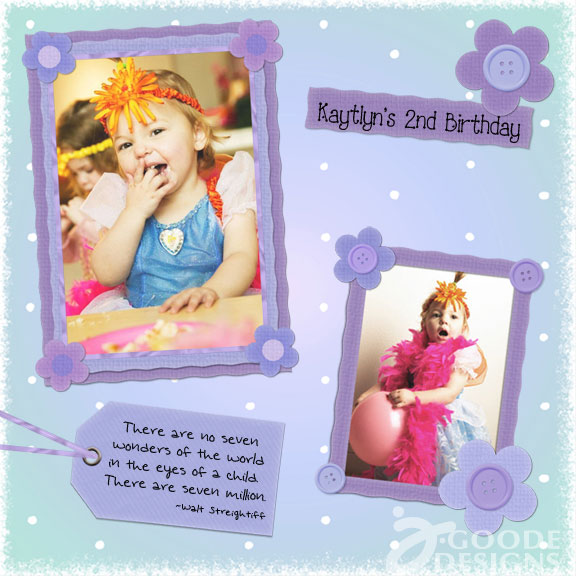
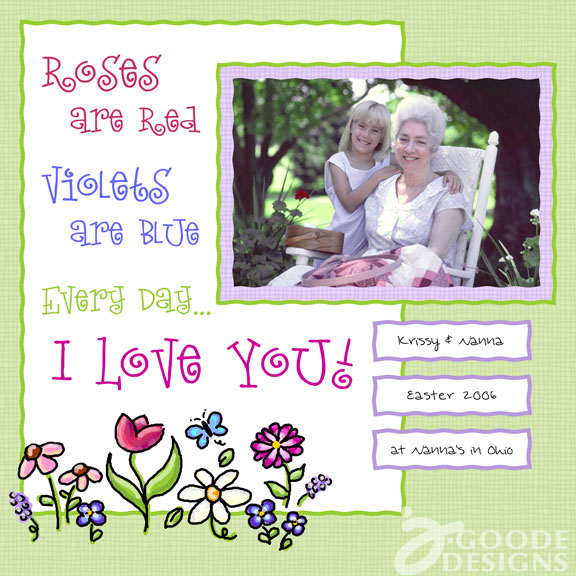
Here are 3 more layout examples I created using digital scrapbooking. There are a number of ways you can incorporate digital scrapbooking into your projects. I like to play with layout ideas on the computer but then recreate the same layout in actual tangible scrapbook supplies – real paper, stamps, stickers, glue and more. Later I will show you how to create these layouts with your own printer, paper and other supplies.

Scrapbooking layout

Pretty spring scrapbook layout

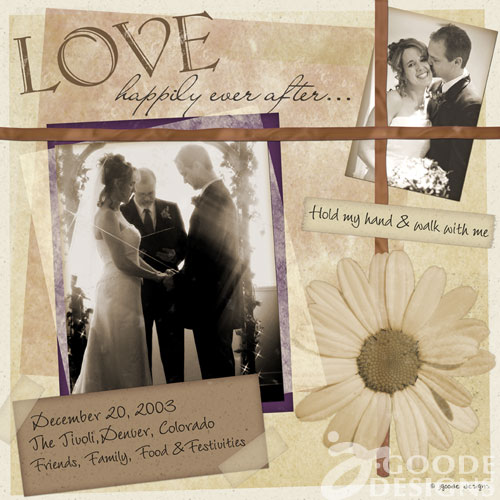
elegant vintage look wedding scrapbook layout

Scrapbooking to preserve memories to enjoy later as well as to pass on to future generations is a fantastically satisfying activity. There are no limits on creativity. The techniques and supplies available for you to choose from are endless. Regardless of your skill level or budget, you too can create beautiful pages that will keep your precious memories alive for years to come.

What do you like most about scrapbooking?

Getting ahead is usually more fuel for getting behind

Running around like a headless chickenThis week’s topic for Illustration Friday was “ahead”.  A number of images come to mind.. a chicken without a head, the behind of a any large smelly animal or a picture of a crocidile that my grandmother used to have on her bulletin board. Right above the crocidile there was a little note that said “the more I try to catch up, the more behind I get”.

That’s how I feel. It’s nearly Friday and I’m pretty sure I haven’t checked anything off the list because I can’t remember where I last saw the list. It must be somewhere between the hot glue gun and the mixing bowls but I have no idea which day I lost it. Maybe it’s partying with the missing socks, I don’t know.

What I’ve been up to:

  • Re-discovering my craft happiness with Eileen Hull’s blog hop – I even started organizing my craft space. It’s now the biggest room in the house (of course it is, it’s 1/4 of the unfinished basement).
  • Creating projects with my daughter for ProjectsforPreschooler.com, a new site I started last month as a way to share ideas of fun activities and crafts to do with the younger kids.
  • Trying to put together a portfolio for an upcoming art licensing show, SURTEX which I am attending next month in NYC. I’m hoping to find my way into the arms of loving manufacturers – or at least see the penguin in major retail outlets.
  • I’m making buttons to give to give away for World Penguin Day
  • And more buttons for a local event next month
  • Drawing more designs, creating some coloring pages and digital stamps and brainstorming new penguins
  • getting ready for my participation in an online e-course – I’ll be sharing tips about how to make money through print on-demand

and a whole slew of other things… but I’m happy to report that I’m finally getting back into focusing my efforts towards art rather than just internet marketing or programming. I’m sure I’ll jump back and forth as I always do, but the penguin needs me and I need him… so here I am enjoying the scents of the glue.