Make your own pretty wire garden art

Making wire garden art

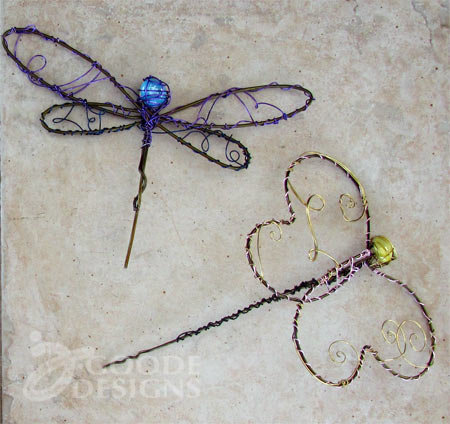
Here’s a really neat spring project you can make using recycled wire hangers. I know, you should return them to the dry cleaner.. but why when you can make pretty flowers and dragonflies to decor your garden instead? Plus, you get the added benefit of making a pretty piece of art using a bit of recycled materials, Yay You! You can make any shape you’d like, just keep in mind that bending the hanger wire is an acquired skill that takes a little patience and practice.

Making wire garden art

Recycled wire garden art

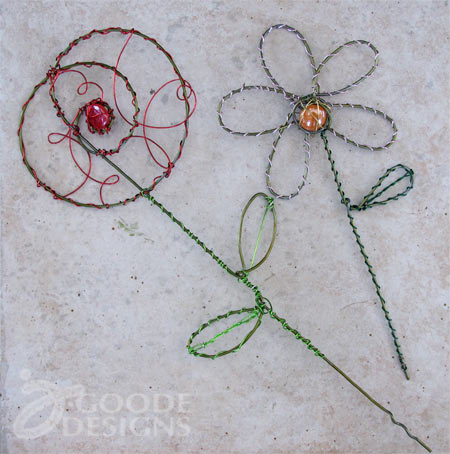
pretty wire garden art pieces

Supplies you’ll need:

Make sure the supplies you use can withstand the elements as you’ll be placing these outside.

  • Wire clothing hangers
  • Metal jewelry wire in a variety of colors
  • Glass gems
  • Wire cutters for the jewelry wire
    – Tip: to cut the hanger wire, bend back and forth until it snaps. I did not cut any hangers in these examples.

Steps for making wire garden art

How to make wire garden art:

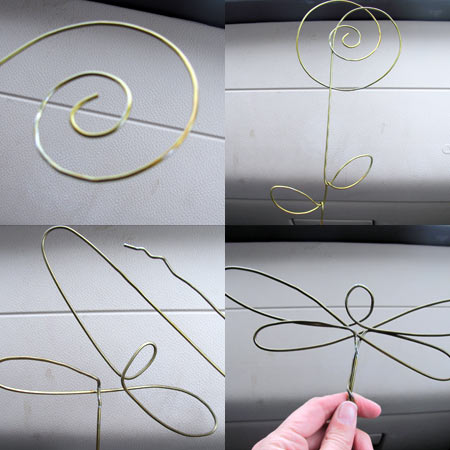
  1. Remove any paper and straighten out your clothing wire. Don’t worry about the very end where the wire twists from manufacturing, you can incorporate this into your art design.
  2. Carefully bend wire into desired shape. A trick to quick bending is use the flattest surface of your thumb to guide the bend you’re working on. Make sure to leave a port of the wire straight as the “stick” of the garden art piece.
  3. Using jewelry wire, wrap and secure joining sections of hanger.
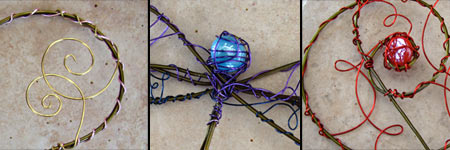
  4. Use jewelry wire to wrap and secure gems in desired locations and embellish with wire accents.

Under the sea for charity

The CHA summer show is fast approaching, and as much as I loved attending the CHA winter show in January, I am unable to attend this next upcoming event. However, my art will be there! I was asked to participate in an fund raising event for the Wyland Foundation. There will be a silent auction with the proceeds going to help educate children about the environment and conservation.

The theme for the even is “Under the Sea”. Living in the middle of a land locked state, I rare have the opportunity to experience anything relating to the ocean first hand, so this project was particularly fun for me to imagine.

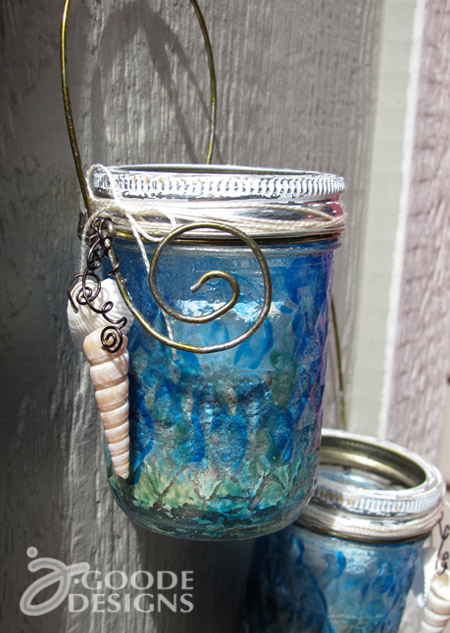
The first item I made is a pair of hanging votive holders. I imagined walking along the beach at night near old wood posts, each glowing from a single hanging candle.  I tried to create this same kind of deocr item that can be used both inside and out. Each glass jar is hand painted using enamel paints from Plaid. The lids were painted with several different shades of craft paint and then sanded for a weathered look. Then I added the hanging handle and large swirl embellishment by bending a wire clothing hanger. Finally I added small bent wire accents along with hanging sea shells and a bit of thin twine. Finally, each candle holder was partially filled with sand and a small votive candle was added.

hanging votive holder for charity event

The second donated item I created was a summer outfit for a toddler girl. The inspiration for this piece was the vision of an afternoon picnic on the beach with a cool breeze. The skirt was sewn using re-purposed linen which I then stamped with fabric paint using 3 seashell design I hand cut in craft foam. Both the skirt and top also incorporate white eyelet fabric.

hand sewn summer outfit for charity event

hand sewn little girl outfit for charity event

I’m so thankful this was a summer themed project, had it been winter I would have been inspired to knit… not one of my strengths.

Make a get well gift – Little box of sunshine full of hugs

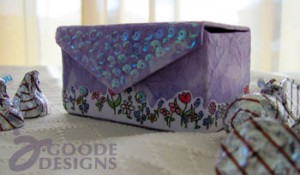
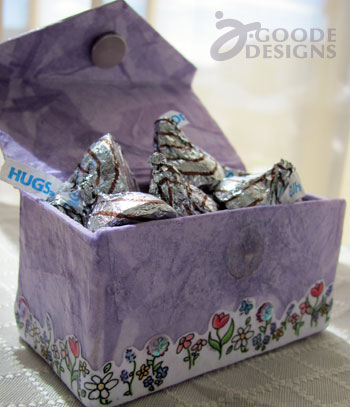
Box of Sunshine filled with hugs by JGoode - Sizzix Scoreboard rectangle boxHere’s another great project idea in conjunction with Eileen Hull‘s Sizzix ScoreBoards dies, the rectangle box. It’s a really nice basic shape with the added touch of a front flap to complete the box.

Beginning of a happy accident

I have to say with this project I had a complete fail of my own creation. I originally wanted to make a soft fabric covered box, but because I don’t actually own this die, I was using a single cut out version to attach my design to. So instead of attaching fabric and all before cutting the mat board (highly recommended) I was trying to use fuse-able fabric and then hot glue… unfortunately it was an utter fail! My box was entirely too thick with layers of fabric making it look bulky instead of cute. So I ripped everything off… which in turn created a complete mess of the pre-cut mat board.

Now What?? I didn’t want to throw in the towel. This particular project was designed with another designer in mind who is currently in the hospital. I wasn’t ok just giving up and not doing something, so I brainstormed and came up with the perfect solution…

When in doubt, decoupage!

If you use a tissue that isn’t coated, it works nicely as a decoupage component that makes really cool textures and patterns through overlapping, crinkling and folding. It also adds a nice hand made paper look to the piece.

You need:

  • un-coated tissue paper
  • mod podge
  • small paint brush – a chiseled edge works best when you have corners to cover
  • small bowl
  • water

Box of Sunshine filled with hugs by JGoode - Sizzix Scoreboard rectangle boxTo decoupage with tissue…

  1. First make a mixture of 2 parts mod podge to 1 part water. The consistency should be a little thicker milk.
  2. tear the tissue paper into pieces – 1″ – 3″ square or rectangle
  3. scrunch up the paper so you create wrinkles in it, this makes for some nice textures and ease of moving around while painting.
  4. paint a coat of the mod podge mix onto the surface you wish to cover.
  5. place tissue on coated surface and brush more mod podge over as you work the paper around – essentially you are painting a layer and then painting over the layer of paper.
  6. continue to add pieces of paper, overlapping as you’d like until the piece is covered as desired.

For this project I first created a layer of white tissue and let it set overnight. This helped to even out all the wacky bumps and tears in the mat board from removing the previous fabric design. Then I went back and added a few overlapping layers of a light lavender.
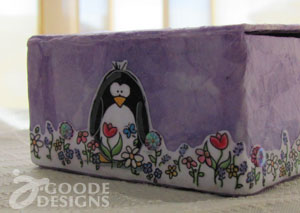
Box of Sunshine filled with hugs by JGoode - Sizzix Scoreboard rectangle boxOnce the tissue layers dried, I took one of my own illustrations and adapted the layout to fit this box. I printed and cut it out and then decoupaged it on as well. I chose the penguin in a flower garden, that’s one of my personal favorites and I think it makes for a great bit of sunshine.

I then added some loose lavender sequins (with mod podge) to the front flap on the box s well as on select flower.

For a closure device, I used a magnet set by glueing one magnet on the back of the flap and then cutting out a hole in the main body of the box, fitting the second magnet inside and then concealing it with more tissue decoupage.

I finished off this little box by adding a small pile of Hershey’s Hugs candies to make the perfect get well gift…

A happy little box of sunshine filled with hugs.

If you liked my project you might also like what other’s in this series have come up with.. please take a few minutes to check out their amazing creations! Love to hear your thoughts… leave a comment!

For more fun ideas, check out Sizzix craft products
Make your own pretty scented tea cup flower bouquet

Here’s another fun project idea using a Sizzix Scoreboard die by Eileen Hull. This particular die is a tea cup and comes in 4 pieces: one tea cup shape, bottom/saucer, body (side and bottom wrap around) and a cute little tag. You’ll need to cut out 2 tea cup shapes to make the full piece.

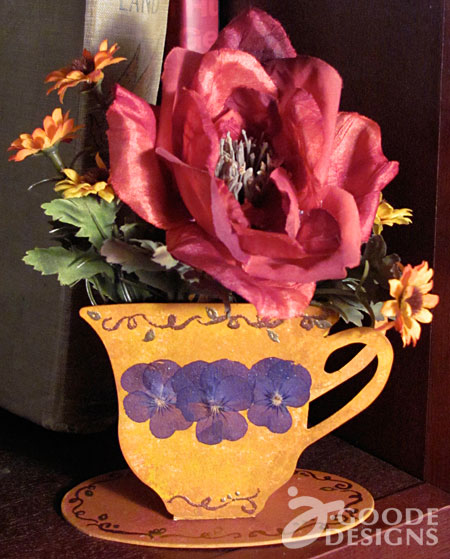
Sizzix tea cup flower bouquet by JGoode Designs

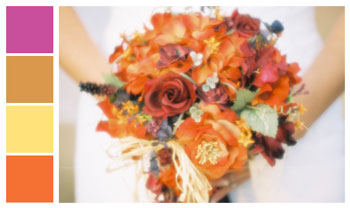
For my version of this project there was an additional color challenge suggested by Brenda Pinnick. She offered two different color themes and I chose the pretty gold and raspberry combination. Just so happens this was very similar to the color theme I had chosen for my wedding (eons ago) but because I never throw anything away, I still had some random pieces and parts from creating my bouquet and other wedding accessories. Perfect fit for me I say!

Sizzix tea cup - Brenda Pinnick color challage

On to the crafting fun part…

How to create a tea cup flower bouquet
with the Sizzix Tea Cup die by Eileen Hull:

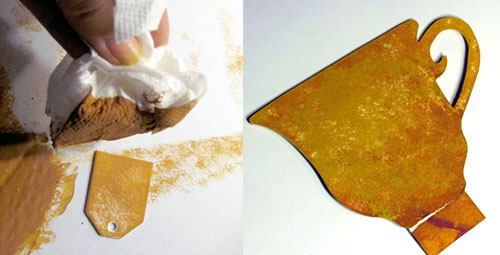
  1. Paint each of the individual pieces using a paper towel with Plaids craft plaint and a blotting technique. Paint in layers of a caramel color along with a mustard/gold yellow color to make the texture and color variation effect.
  2. Sizzix tea cup - blotting paint

  3. Using a hot glue gun assemble the pieces to create the cup – do not attach to the saucer yet.
  4. Sizzix tea cup - assembly

  5. Spot paint (blotting) any corners or edges that have been missed before assembly.
  6. Next hand paint a swirl design with embossing solution for use with embossing powder. Sprinkle on bronze and gold embossing powder and then used the heat gun to finish off the technique. Here’s a great tutorial for embossing tips and techniques.
  7. Using Mod Podge, decoupage 3 dried pansies (by Pressed Petals) to the front of the cup. Carefully apply a layer of Mod Podge on top of the pansies to create a thin protective coating. These flowers are extremely brittle, so make sure to not use so much glue as they will stick and pull with your brush.
  8. After the initial Mod Podge is dry, add an additional layer of Mod Podge to the entire cup and saucer using the same paper towel blotting technique as the painting process. This will create a subtle shine while adding a protective coat as well as a slight texture effect.
  9. Hot glue the cup to it’s flat saucer base.

To add a subtle scent and flowers to the tea cup gift:

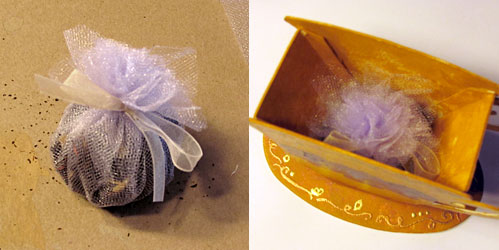
  1. Cut two pieces of tuelle fabric approximately 6″ – 8″ square (or use 2 pre-cut 10” Tulle Circles) layering each other so there is a double layer of fabric.
  2. Place approximately 1/4 c. loose tea in the center of the fabric, (I used American Tea Room‘s Broche tea – YUM!).
  3. Gather all sides and tie with a ribbon so there is a nice ball of tea.
  4. Sizzix tea cup - tea ball

  5. Fit the tea ball into the bottom of the tea cup.
  6. Cut fake flowers to desired length/height.
  7. Push flower stems into the tea ball in the cup to create desired flower arrangement.

Sizzix tea cup flower bouquet by JGoode Designs

Get Involved!

There is a group of us making our own variations of this project before the product actually launches – Check out all the other cool ideas created by other designers.

Sizzix Blog Hop

Other Participating designers:


Making bookmarks – JGoode style

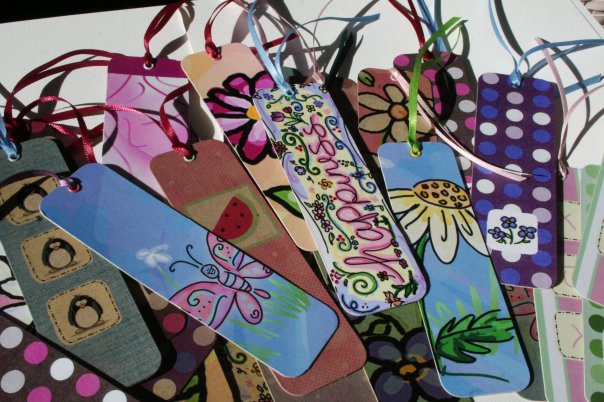
I’ve made bookmarks that feature my own art as yet another way to share the happiness that is a JGoode doodle. They’re nice and thick and really easy to put together, plus they can even be made from recycled materials.

Bookmarks by JGoode

Here’s how to make your own handmade bookmark:

You will need

  • an empty cereal box
  • spray adhesive, xyron adhesive or other adhesive
  • hole punch or crop-a-dile
  • 1/8″ ribbon cut to an 8″ length
  • scissors/paper cutter
  • spray varnish
  • designs to print or materials to hand draw your own designs

cereal box for bookmarks

Make it

The key is to create the art and add the back before you cut each bookmark down to size.

  1. Cut your cereal box into two sheets small enough to run through your printer, or hand draw/create your design directly onto one sheet of the cardboard.
  2. Using adhesive, add the other piece of cereal box cardboard to the back side so you now have one side with art and the other side is a nice clean brown (as opposed to the printed side of the cereal box). For this step I use an xyron to add adhesive to the entire back of the sheet of cardboard.
  3. Cut down to size using your cutter, cut your bookmarks from the sheet, approximately 1.5″ x 7″
  4. I chose to use a crop-a-dile corner chopper to round the corners of my bookmarks (optional)
  5. Spray with varnish and let dry – you could also use laminate or run through your xyron to add a laminate before adding the final touches of your bookmarks (optional)
  6. Using a hole punch of crop-a-dile, puch a hole centered about 1/4″ from the top of each bookmark
  7. Here I added an eyelet, but you can skip this step if you’d like (optional)
  8. Add the ribbon
  • fold ribbon in half
  • push through hole in bookmark
  • pull other end of ribbon up and through the loop you just put through the hole
  • pull tight

adding ribbon to hand made bookmark

If you are feeling really crafty, you could decoupage, collage or even stitch onto your bookmark cardboard instead of printing or coloring. The options are limitless!

Suggested tools:


Mom is Great!

We love our mommas because they have loved us for so long… so I have one thought for all the moms to stand tall and proud:

blog.gif

Some thoughts about mom…

A man’s work is from sun to sun, but a mother’s work is never done. ~Author Unknown

A man loves his sweetheart the most, his wife the best, but his mother the longest. ~Irish Proverb

If I had a single flower for every time I think about you, I could walk forever in my garden. ~Attributed to Claudia Ghandi

Mother’s Day is May 13th. JGoode Designs is celebrating moms around the world with a variety of fabulously fun doodles for mom. Check ’em out!

[tags]mother’s day, mom jgoode,holiday[/tags]

New Spring Flower Garden Collection

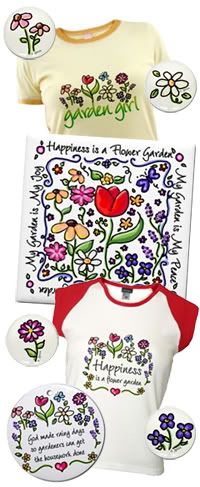
jgoode designs new spring gift collection
Brand New Spring Flower Garden Collection

Great for Mother’s day, Gardeners, Spring birthdays and Every day!

Available Designs:

Each design is available on a variety of gift items, t-shirts and apparel, home and office decor and collectibles.

Tags: , ,