Home Sweet Home

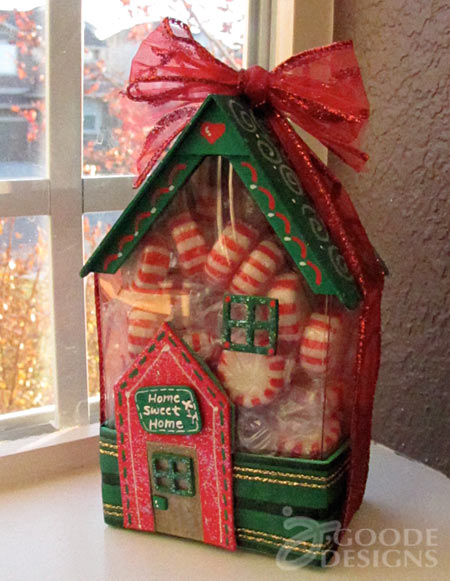
I am jumping on board with another blog hop with Sizzix and some amazing designers. This week’s project uses the Sizzix ScoreBoards Pro 3-D house die by Eileen Hull. It’s an adorable little house that comes complete with a wide array of accessories and add-ons. I decided to make a candy box, and since the holidays are so close, a Christmas theme is surely in order.Plus, no one hands out peppermints for Halloween, so this was a good excuse to go buy some.

3-d sizzix house die by eileen hull

I have to say, my favorite part about this die are the tiny window frames. Ever since I was little and had a set of LEGOS with the little windows with shutters… I’ve been hooked on tiny windows.

I chose to modify the mat board pieces and parts and replace the main house body with a clear plastic so you can see the candy inside the box. The plastic tends to bow a bit when the box is filled so I also added trim to the front and back of the roof to create a lid, holding the plastic box in place.

3D house die from Eileen Hull and Sizzix, decor by Jen Goode

Interesting tid-bit: I couldn’t find card stock thick sheets of plastic so I ended up purchasing a clear plastic Halloween paint can and took it apart for this project.  My original idea was to use enamel and hand paint some decor around the bottom of the box, however the paint can had Halloween decor printed on it, so I had to use the noggin to come up with design that covered the pre-printed plastic.

Supplies I used for this project:

Check out the 60+ other fabulous designer projects on this bloghop:

Sharing some happiness with Money Minded Moms

Late in the summer I received a call from a friend of mine, Missy Ward, inviting me to get involved with a new project she was working on. As soon as she finished describing the project, Suze Orman’s new community called Money Minded Moms, I was shocked I was having this conversation. Me? Really? How cool is that!?

A thousand things ran through my mind in about 1.67 seconds. I’ve gone through the “can I do it” to brainstorming a gazillion things I want to say or share.  I’m sure I even envisioned myself with pom poms and a megaphone… where was the rest of the elated rallying troops for this excitement!?

It wasn’t real for me until this week when I first saw my happy face on the website. This is fantastic! I’m so excited to be part of an amazing group of women sharing their ideas, experiences and expertise with moms around the world. We’re all here to help teach, encourage and empower each other to gain more control of our money instead of letting our money control us.

Money Minded Moms
Money Minded Moms

This is another opportunity to put our best creative foot forward. Creativity isn’t just about creating pretty things, its about thinking smart, coming up with the best possible solution and doing something amazing with our ideas. This type of thinking applies to money too.

This community presents a fantastic opportunity for moms everywhere. We can work together to make this success work for us all. I haven’t always been the best money manager I can. We all struggle with balancing a budget and a family. We want to give our kids the very best yet teach them that it takes hard work to earn what we have. We want them to grow up to become successful, happy adults. Managing all this and staying within financial means is often a daunting task. This community was created so that we can come together and share ideas.

I’m officially a “featured contributor”. I plan on sharing my own ideas for saving money – a lot of which focuses on making things yourself. You don’t have to be an artist to make wonderful gifts and create a little happiness with a bow for someone else. I’ll also share fun little recipes and ideas for spending smart.

I hope you’ll join me on this journey – it will definitely be a grand one!

Check out the other fabulous women writing for Money Minded Moms:

Vicky CollinsAskTheMama.com

Doreen KukralMomGoesGreen.com

Mariel LaSassoLaSasso Griesmeyer Law Group PLLC

Tricia MeyerHelping Moms Connect

Sabrina O’MaloneWorkingMom.com

Eva RosenbergTaxMama.com

Kim RowleyKey Internet Marketing

Phyllis SheltonLTC Consultants

Liz StraussSOBCon

Missy WardAffiliate Summit.com

Julie Vazquez – Community Manager – Julie’s Journal

It's not a party until you have cake

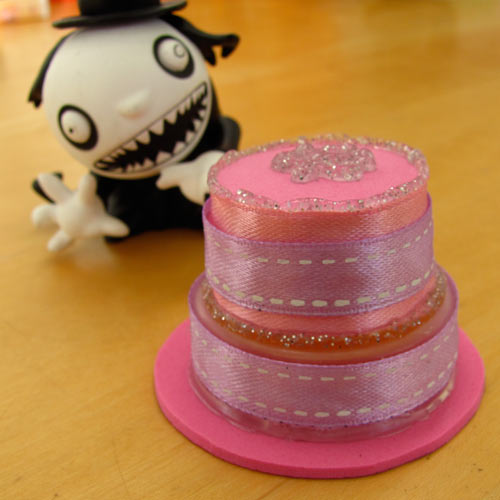
Make a super cute mini cake
Super cute mini cake by Jen Goode

I love all things cute and tiny so when I saw today’s post about Tiny Party hats at Dollar Store Crafts, I had to chime in with a little cake. A party just isn’t a party until there is some kind of cake, you know. My kids have always played with the tiny plush critters. When my oldest was really young, even McDonalds gave away tons of tiny Beanie babies today. The toys have been passed down from kid to kid so each animal is well loved and probably in need of a celebration. So, I decided I had to chime in with my own addition to this party… cake!

make mini cakes

I had 2 requirements for these mini edibles: 1.  Dollar Store Crafts inspired the idea, I wanted to make sure the cost was relevant. 2. These are items to be played with by kids, so they had to be kid safe/friendly.

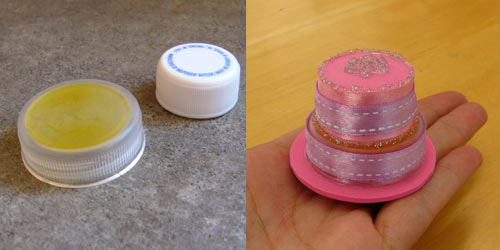
Here’s what I came up with for the tiny party fun. I created 2 mini cakes using the lids from various beverage bottles, hot glue, craft foam, glitter glue and ribbon. The lids are recycled items. Hot glue I always have on hand – some say it’s messy to work with, but I love the stuff! The craft foam can be purchased from the Dollar tree (a package of 32 sheets in 6 colors for $1). The glitter glue I also purchased from DT, a package of 4 colors, 2 tubes each for $1. The ribbon I purchased 6 mini rolls in a pack for $1 at Joann.

I’m not sure i can do the math on this one.. what, .50 per cake?

make your own mini toy cake
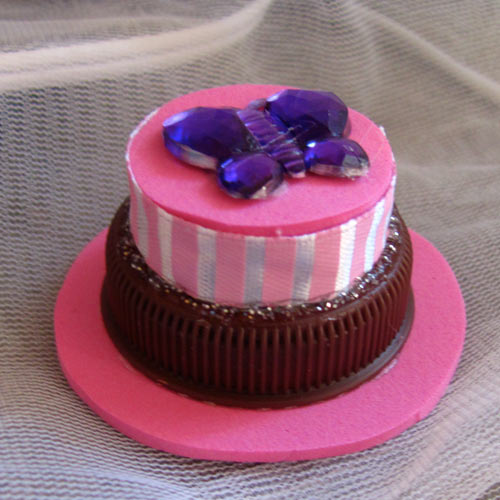
Mini toy cake by Jen Goode

This one is using a chocolate milk lid and a little butterfly gem I had in my stash. Of course everything is pink.. my youngest is indeed a princess! I think these same little cakes might make cute party place holders. You could also choose to use craft paint, beads, and other embellishments if you weren’t allowing young kids to play with them.

The making of Darth Vader

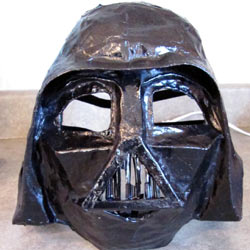
Paper mache Darth Vader mask
Paper mache Darth Vader mask by Jen Goode

This year I procrastinated the Halloween costume making. My family and I went on a trip the 2nd week of October and I was sure there’d be plenty of time to deal with spooky prep when we got back. We returned October 24th and it was only then that I realized how close everything was.

“What, Halloween is this weekend??” I was really in shock.

My son wanted to be Darth Vader and we had zero ready. Thankfully my daughter wanted to be witch and then a fairy and then a witch… either way, we had enough dress up clothes for her to accommodate a few witch fairy princesses.

I decided the best way to go was paper mache. I’m not a huge paper mache guru, but I can hold my own in the paper craft arena. So off I went, balloon, paper and flour goo in hand… literally.

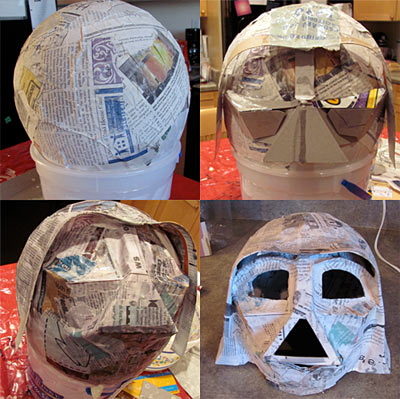
I took on this mask making task with the mind set that I was sculpting. I first built a standard, rather thin, balloon shape and let it dry.

Making a paper mache Darth Vader Mask
Making a paper mache Darth Vader Mask by Jen Goode

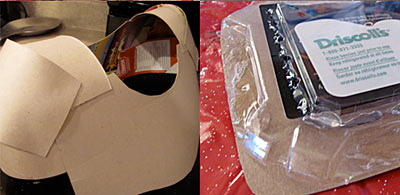
Next, using cereal box cardboard, I created various shapes to form the sculpted face of dear ol’ Darth. Again I added a thin paper mache later and let it dry. I continued the process of adding shapes and then layers of paper mache until I had the form I wanted. I then cut off the back of the balloon shape leaving only the front of the mask. I cut out the holes for the eyes and mouth. added a little more paper mache to clean up the cut edges. I used a portion of a plastic berry container to create the vented fronts of the mouth piece. I used the eye pieces of some old sunglasses for the eye sockets. I hot glued the various pieces and parts together.

Finally I sprayed the whole thing with black spray paint and then a high gloss varnish. The mask looked a little less bumpy before the varnish, but in the dark no one knew the difference. I glued on elastic in the back to hold the mask on.

The rest of the costume was made with the cardboard from a bunch of cereal boxes. Finally I had a valid reason to be keeping all that cardboard around which drives my husband crazy!

Darth Vader DIY costume
Darth Vader DIY costume by Jen Goode

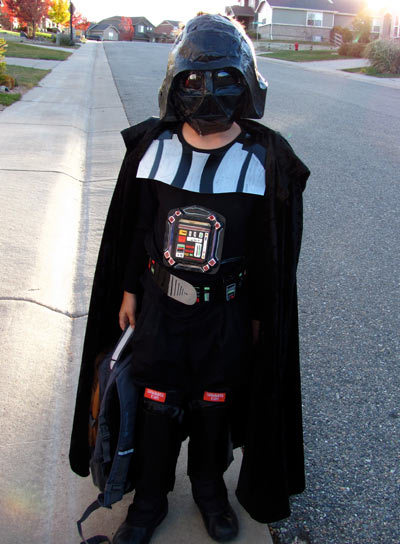
I made a collar with the cardboard and hot glue. The I made a set of sin guards which were held on with elastic around the back. Using some tiny battery operated lights we had a fancy light up belt and chest computer which was attached via Velcro to an old black shirt. The belt was made of cardboard and a layer of ridged plastic from the berry container with a Velcro piece at the buckle. The I made a fancy little techie chest piece out of the top of the berry container. The belt held the batteries for the lights which included a handy on/off switch… yet we still managed to let the thing run down to dim. All details were painting using my new Marvy Uchida paint pens. It was so much easier to draw on the details than to paint the tiny controls with a paint brush.

Darth Vader costume
Darth Vader costume by Jen Goode

This was a fun project for me. My son was happy and my budget wasn’t busted.

Materials:

  • Newspaper
  • paper mache mix – flour and water
  • Balloon
  • recycled berry container
  • A giant ice cream tub to hold the balloon while I worked on it
  • Black spray paint
  • Hot glue and glue gun
  • High gloss spray varnish
  • Black elastic 1/2″ wide
  • Marvy Uchida paint pens – metallic silver, red, green, blue

Magic in a marker

My daughter has become rather picky about her wardrobe these days. She changes at least 3 times a day and that’s not including the various princess costumes she has to wear throughout her waking hours. This morning was beyond cold so I grabbed some jeans for her to put on. She refused saying “I only like pretty pants”. These, unfortunately, were plain ol’ regular jeans… no bling, no bedazzling or embroidery, you know, the kind we wore as kids.

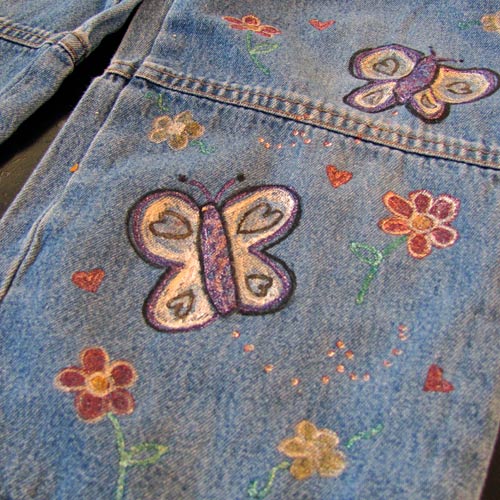
Lucky for me, I just got a hold of some new fabric markers to try out. The package arrived after today lunch and it couldn’t have been better timing. They’re the MARVY Fabric Markers (the fancy glitter variety). I have a pile of fabric paint, but mostly the kind you paint with a brush. In the past, fabric pens and I haven’t always played nice together. Today, with these ” boring pants” being abandoned so quickly I decided to try the pens out on the denim.

Painted kid pants
Painted kid pants by Jen Goode

I was delighted to see how easy these were to draw with. In just over 20 minutes we had some pretty new pants that my darling princess will happily wear (except now we’ve realized they’re too big – ha!). I love how thick the fabric paint is, the color coverage, even on the denim, is fantastic. The pen makes it much easier to draw than the standard paint and brush but the quality of the paint is comparable for sure. I used silver, gold, purple, red and blue… all glittery colors.

I have other colors I’ll try out as soon as I come up with a new fabric project – I love drawing on fabric!

A couple things about using these pens:

  • The tip is great for drawing especially on more dense fabrics. If you want to try to decorate softer fabrics like cotton such as kids t-shirts or leggings I suggest using a brush tip pen instead (MARVY has some nice brush tip fabric pens too). The tip on this particular pen set is a more coarse material so tends to grab at the softer fabrics. However, if you have a layer of paint on the fabric already, these pens would be great for adding extra accents to your work as a second layer.
  • If you want to layer colors on top of each other, make sure you let the first layer dry first, especially with the glitter markers. Otherwise the first layer just absorbs the color of new layers.
  • Make sure you put a layer of cardboard in between your fabric so you don’t have your drawings leaking through to the back of your shirt or even the table. It would be a shame to make a pretty piece of art on the front of a shirt only to find it’s mirror image on the back. I used an old cereal box… creative and caring for the environment all at once!
  • Finally, when you first get these pens you need to release the ink into the nib (pen tip) before starting to draw. The instructions say to shake and then press down (as if to draw) so the ink is released into the nib. Sometimes, on the first try, the pen will release a bit more ink than you’d expect – this is standard with paint pens, not just MARVY pens. To prevent messes or ruining a project, the very first time you press down on the pen, do it on a nice thick stack of paper napkins of paper towels.

Free shipping at Joann.com! Code: AP319You can buy MARVY Fabric Markers and other Uchida products online at Joann.com. At the time of this writing, they were on sale too!

Happy Crafting!

Bed bugs are taking over the universe!

Well not really. My kids have been bugging me for a few months now about getting them pillow pets. Rather than fork out more cash for yet another fad, I made a big deal about how fun it would be to come up with our own and make them ourselves. They bought it! And then they kept reminding me I came up with such a plan.

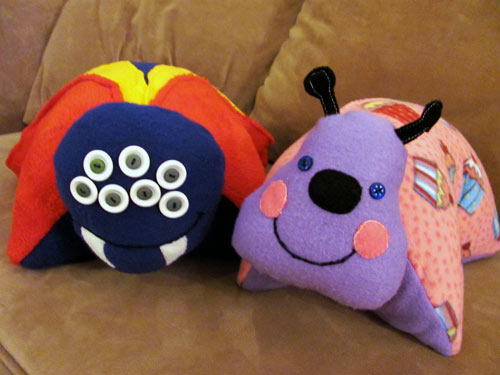
So, last night we sat down, came up with some design ideas and off to work I went creating what we like to call Bed Bugs. They’re pillow critters created to resemble some kind of bug… that yes, we invented. Imaginations tend to run wild over here sometimes.

Bed bugs by Jen Goode

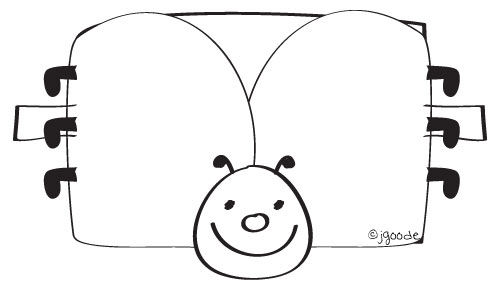
First off is the cupcake ladybug. Her wings are covered in scrumptious cupcakes and little pink poka-dots and double as a big pocket to store those bedtime treasures. She’s got cute button eyes, little rosy cheeks and a soft purple belly just asking for a longer nap time. (We decided to forgo the feet.. they were just asking to be chewed on and pulled off.)

Ladybug Bed Bug by Jen Goode

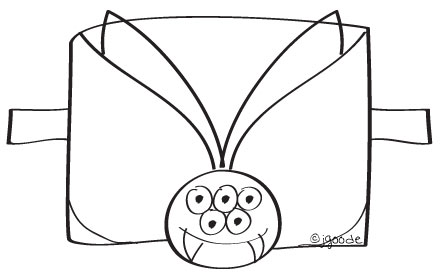
Then we have the less sweet and probably more fattening spider beetle bug, complete in super hero colors – to trick the good guys into thinking he’s friendly. My son mentioned something about “pillow pets have pockets” so I had to make sure this bug did too. Every wing is it’s own individual pocket (there are 4) , perfect for storing Hot Wheels, Bakugan and small tid-bits one finds as they sneak through Dad’s office drawers. This guy was lucky enough to gain a few extra eyes, deviating from the original plan – was already a rebel, even without a head.

Beetle Bed Bug by Jen Goode

Both critters are made of super soft fleece and filled with standard polyfil. I used buttons for eyes and felt and embroidery thread for the other facial accents. Each also has a velcro strap underneath to complete the closure.

I want to send special thanks to Elizabeth at TwelveCrafts who posted a tutorial how to make pillow buddies. I had the body figured out and thought I had the head and then failed miserably… her info helped me re-think and come up with the cute heads we ended up with.

FaveCrafts blog hop
This project is included in this months bloghop at FaveCrafts. Check out what the other designers have created!

Get your spooky gear here

Halloween has so many different faces for different folks. Here in the world of JGoode, Halloween is happy and cute and of course full of sugar! Whether you like witches, ghouls, goblins or, of course, penguins… Halloween is a time to get out there and play a bit.

Check out some of the too cute to be spooky swag you can get featuring fun Halloween designs by Jen Goode:

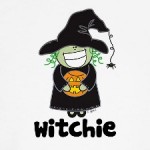
Witchie by Jen Goode
Witchie
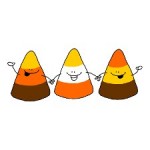
Candy corn by Jen Goode
Candy corn
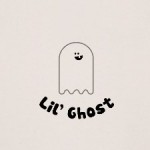
Lil ghost by Jen Goode
Lil ghost
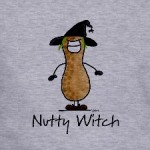
Nutty witch by Jen Goode
Nutty witch
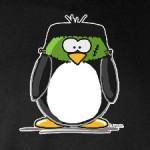
Frankenstien penguin by Jen Goode
Frankenstien penguin
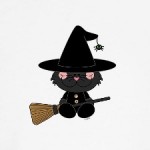
Kitty witch by Jen Goode
Kitty witch
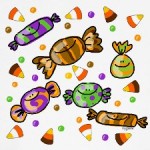
Happy Halloween Candy by Jen Goode
Happy Halloween Candy
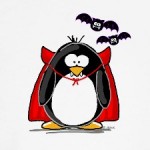
Dracula penguin by Jen Goode
Dracula penguin
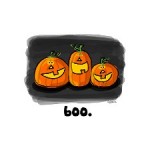
3 pumpkins boo by Jen Goode
3 pumpkins boo

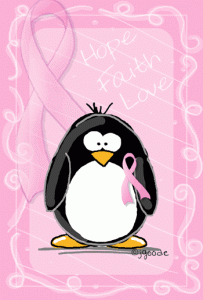
Pink ribbon penguins support breast cancer awareness

pink ribbon penguin by JGoodeI’ve been supporting breast cancer awareness for a number of years and I show off the support with my Pink Ribbon Penguin along with a number of other pink themed designs. Now Cafepress, one of my product manufacturers, will donate a portion of the proceeds from any of my breast cancer awareness products sold through their marketplace. Some of these products are even on sale right now.

An amount equal to 10% of the final purchase price for all products tagged with “breast cancer” and sold through the cafepress.com Marketplace during September 1, 2010 through October 31, 2010 will be donated to Breastcancer.org.

Will you share the penguin love and show your support?

I think no matter what you believe, it’s important to share with others the things you believe in. Stand up and shout it out for everyone to hear… you never know who you might touch or who might agree.

I would love to hear what causes you support and how you get involved!